Four Staircase Wall Art Layouts with Slope Math and Custom Sizes
Four approaches cover almost every stairwell: a diagonal gallery line that mirrors the stair slope, one oversized statement piece, a landing cluster that flows into an ascending line, or renter-friendly ledges and tiles for anyone who can’t drill. The rule that decides success or failure isn’t the art you pick. It’s whether your frame centers climb at the same angle as your stairs. Get that math right first, then choose your style. The measurements and templates come next.
TL;DR:
- Matching the art to the staircase’s slope ratio, typically around 0.64 for a 35 to 40 degree angle, ensures a harmonious display.
- Centering each piece approximately 145 cm above the tread directly below maintains consistent vertical alignment along the stairs.
- Using templates and the slope math ensures wall art is evenly spaced and properly proportioned for stair runs of six to ten steps.
- Renters should prefer gallery ledges, peel-and-stick tiles, or adhesive strips to avoid wall damage while adjusting layouts.
- Custom-sized canvas prints allow precise fits for irregular stairwell dimensions, simplifying layout in non-standard spaces.
Table of Contents
- Staircase Wall Art Ideas Organized by Style
- How to Measure Your Stairs Before You Hang Anything
- Four Reliable Staircase Layouts You Can Copy
- Choosing Frames, Canvas Sizes, and Renter-Safe Mounting
- Lighting and Wall Treatments That Make Stair Art Pop
- Mocking It Up Before You Touch a Drill
- Cleaning and Caring for Stairwell Wall Art
- Matching Your Stair Art to the Rest of Your Home
- Three Rules Worth Repeating
- Get a Custom Canvas Sized for Your Exact Stair Wall
- Sources
Staircase Wall Art Ideas Organized by Style
Most stair walls fail for one of two reasons: the art feels like an afterthought, or it feels like it’s fighting the architecture. The fix is picking a category that matches how much time and commitment you want to put in, then executing it with intention.
Modern minimal diagonal line works when you want a clean, gallery-like statement without visual noise. Pick 5 to 7 frames in the same finish (black, white, or natural wood) and run them in a single diagonal line that tracks the stairs. This is the easiest style to get right on a first try because there’s no clutter to balance, just spacing.
Salon-style eclectic collections suit anyone who wants a stairwell that grows over time. Mix frame finishes, sizes, and even orientations (portrait and landscape together), and lean toward tighter gallery wall spacing of 2 to 4 inches edge to edge for that collected, curated look. This layout forgives imperfection. A slightly uneven line reads as intentional here in a way it wouldn’t in a minimal setup.
Oversized single-piece canvases or mirrors solve the problem for stairwells where a gallery would look busy or where the wall is narrow and tall rather than long. Designers often recommend sizing up more than feels comfortable, starting around 24×36 inches and going to 36×48 inches or larger depending on how much vertical wall you’re covering.
Wallpaper or accent paint is the alternative to hanging anything at all. A bold pattern or deep color on just the stair wall turns the whole stairwell into the design statement, and it sidesteps every measurement problem that comes with frames.
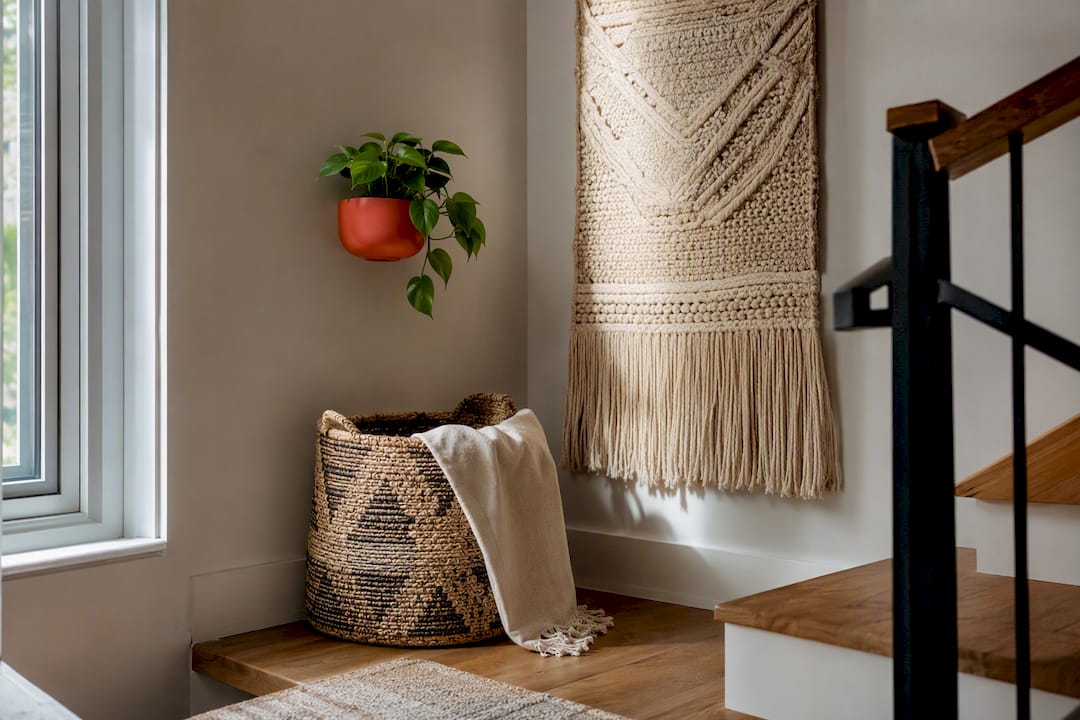
Textiles, baskets, and plants round out a stairwell without needing exact alignment. A woven basket, a small wall-mounted planter, or a textile hanging can fill an awkward gap near a landing where a frame would look forced.
Renter-friendly options matter just as much as style. Gallery ledges let you lean and layer frames without a single extra hole, and they’re widely considered the best compromise for renters who want to rearrange seasonally. Peel-and-stick photo tiles and adhesive picture strips cover the rest, handling lightweight prints without wall damage.
A curated list of 30 staircase wall ideas from design editors shows the full breadth of possibilities, ranging from full wallpaper treatments to mixed-media clusters with mirrors and sconces mixed in.
How to Measure Your Stairs Before You Hang Anything
Here’s the math that separates a stairwell gallery that looks professional from one that looks like it’s sliding downhill.
Step 1: Find your slope ratio. Measure the rise (vertical height) and run (horizontal depth) on three separate steps, then divide rise by run. A typical example: an 18 cm rise over a 28 cm run gives a ratio of roughly 0.64, which lines up with the 35 to 40 degree slope common on most residential staircases. Averaging three steps instead of measuring just one smooths out small construction inconsistencies that would otherwise throw off your whole line.
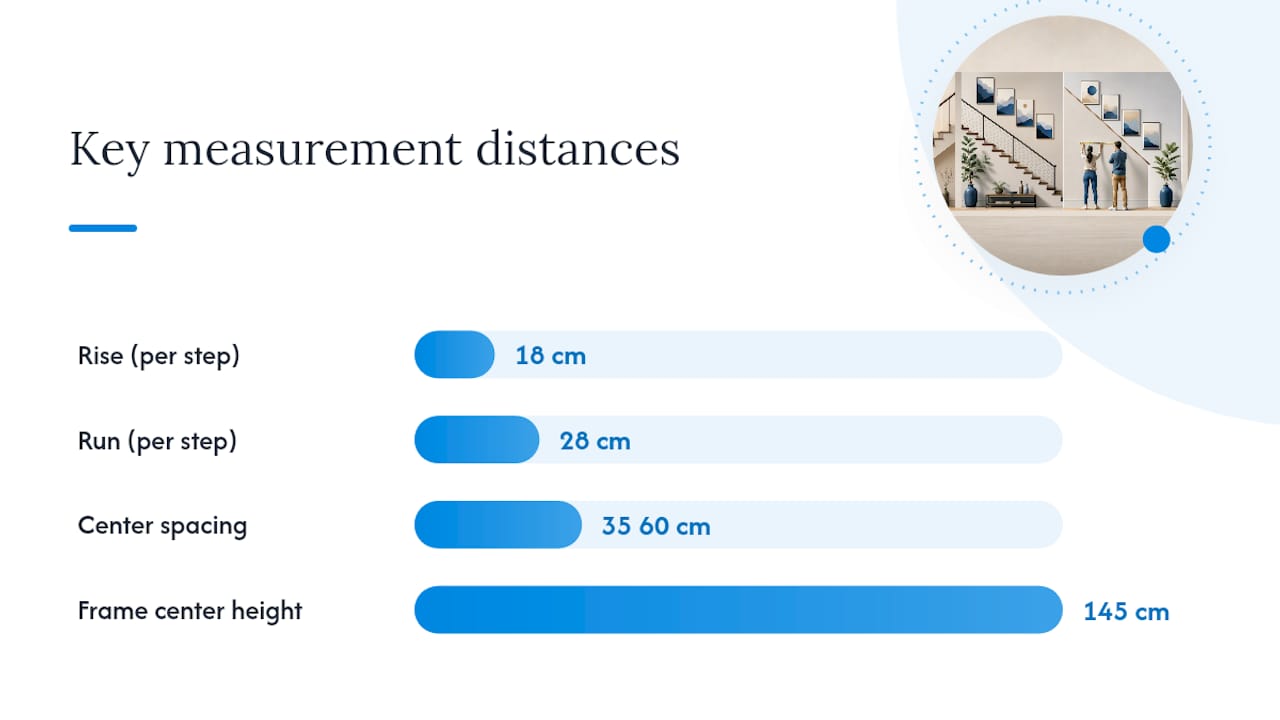
Step 2: Apply the per-step eye-level rule. Instead of using one flat-wall eye-level height for the entire run, place each frame center about 145 cm above the tread directly below it. This is the single change that stops frames from looking like they’re drifting away from the stairs as you walk up.
Step 3: Lock in consistent center-to-center spacing. Measure horizontally between the center points of each frame, not the edges. A spacing of 35 to 40 cm between centers works for most mixed-size stair galleries, and consistency matters more than the exact number you choose.
Quick tool checklist:
- Tape measure and a level
- Painter’s tape (for marking the slope line directly on the wall)
- Paper templates cut to your frame sizes
- A pencil and a helper to hold frames in place while you check sightlines
Pro Tip: Measure your three steps at the same point on each tread, near the front edge, not the back. Measuring inconsistently is the most common reason people end up with a slope line that doesn’t match their actual staircase.
Four Reliable Staircase Layouts You Can Copy
Once you know your slope ratio, these four templates handle nearly any 6 to 10-step run.
- Template A: single line, identical frames. Use 6 to 8 matching frames (8×10 or 11×14 inches) for a photo series or a set of matching prints. This is the most forgiving layout for a first attempt because uniform sizing hides small spacing errors.
- Template B: single line, mixed sizes. Combine 5 to 7 frames of varying sizes, anchoring the largest piece near the bottom or top of the run to give the eye a resting point, then filling in smaller frames around it.
- Template C: two-line stagger. Works only when your stairwell has enough wall height for a double band, this layout doubles your display area by running two parallel diagonal lines a consistent distance apart.
- Template D: landing cluster plus ascending line. Group a few art pieces in a cluster at the landing, transitioning into a single ascending line along the stairs. This works especially well when the landing wall is wider than the stair wall above it.
These four approaches reliably handle the wall depth and step count found in most homes, whether you’re working with a straight run or one that turns at a landing.
Choosing Frames, Canvas Sizes, and Renter-Safe Mounting
Frame choice affects both how the art reads and how forgiving your installation will be.
For anchor pieces (the largest or first frame you hang), 16×20 or 18×24 inches gives enough presence to set the tone for the rest of the layout. Filler pieces complement the composition with smaller frame sizes that don’t compete with the anchor pieces. Keep matting consistent if you use it. A mismatched mat pattern is one of the fastest ways to make an otherwise good layout look unplanned.
Stick to one frame family (all black, all natural wood, or all white) unless you’re deliberately going for the salon-eclectic look, where variety is the point rather than the flaw.
For mounting:
- Gallery ledges let you swap art by season or mood without adding a single new hole, and they’re the top pick for renters who move frequently.
- Adhesive picture strips handle most frames under 5 pounds without damaging drywall.
- Peel-and-stick photo tiles work well for casual displays and cost little enough that experimenting doesn’t sting if you change your mind.
- Traditional anchors are still worth using for anything heavier than a small frame, especially on a stairwell where a fall has more distance to travel.
Edge-to-edge spacing of 2 to 6 inches between grouped frames gives you room to adjust density from tight and collected to airy and modern.
Lighting and Wall Treatments That Make Stair Art Pop
A staircase is often the dimmest wall in the house, and even a well-planned gallery disappears without the right light.
Sconces placed along the slope, roughly at the same height as your frame centers, cast even light up the entire run instead of leaving the top or bottom in shadow. A single large mirror, rather than a gallery, often works better on narrow stairwells because it bounces existing light around and visually widens a tight space. Wallpaper or paint should stay consistent in scale with whatever room sits at the top or bottom of the stairs. A pattern that feels balanced in a wide hallway can feel overwhelming in a narrow stair run.
- Check headroom before hanging anything that protrudes past the frame depth (sconces, shelves, 3D pieces)
- Keep protruding decor at least a few inches below the handrail line to avoid snagging clothing or shoulders
Mocking It Up Before You Touch a Drill
Skip the guesswork and build a paper version of your layout first.
- Trace each frame onto paper (the wrapping-paper trick works well) to create true-to-size templates.
- Tape the templates to the wall using painter’s tape, following your calculated slope line.
- Mark each frame center directly on the tape, then step back and check the sightline from both the top and bottom of the stairs.
- Hang your anchor piece first, level it, then work outward so every other frame references a fixed point.
Pro Tip: Leave the paper templates up for a full day before committing. Walking past them at different times of day reveals spacing issues that are easy to miss in a five-minute glance.
Before hanging anything heavy, check for wiring or plumbing behind the wall and confirm your anchors are rated for the frame’s actual weight, not just its apparent size.
Cleaning and Caring for Stairwell Wall Art
Stair walls collect more dust and handling than most other walls in the house, mostly from foot traffic and temperature shifts near stairwells.
Canvas prints need only a light pass with a dry microfiber cloth every few weeks. Avoid glass cleaners or anything with ammonia, since they can dull the print surface over time. Framed prints under glass can handle a gentle glass cleaner applied to the cloth first, never sprayed directly onto the frame, which prevents moisture from seeping behind the mat.
Mirrors need slightly more attention on stairwells because they show smudges and handprints more visibly than art does. A standard glass cleaner works fine, but wipe in one direction to avoid streaking, and dry immediately with a separate cloth.
Wallpaper on a stair wall is more exposed to scuffs than wallpaper elsewhere, particularly near the handrail where hands brush against it. Most vinyl and vinyl-coated wallpapers tolerate a damp cloth and mild soap, but check the manufacturer’s care instructions before using anything beyond plain water, since some finishes stain or peel with the wrong cleaner.
Textiles and woven baskets just need occasional vacuuming with a brush attachment or a shake-out outside, since they trap dust more than smooth surfaces do. For gallery ledges holding leaning frames, dust the ledge itself regularly. Dust buildup there transfers straight onto the bottom edge of every piece resting on it.
Matching Your Stair Art to the Rest of Your Home
Your stairwell isn’t a separate room, so its art shouldn’t look like it belongs to a different house.
Start by pulling one or two colors directly from whatever room sits at the top or bottom of the stairs, whether that’s a living room accent wall or a kitchen backsplash. Repeating even a single color ties the whole space together without forcing an exact match. If your home leans toward warm, traditional tones, an all-black modern gallery frame set will feel out of place no matter how well it’s spaced.
Frame finish matters here too. Matching your stair frames to your home’s existing hardware finish (brass, matte black, brushed nickel) creates a quieter kind of cohesion that most guests notice without being able to say exactly why the space feels put-together. If your stairwell connects two rooms with different color schemes, choose art with a neutral palette that can bridge both without clashing with either one.
Scale should follow the logic of your home’s overall style, too. A minimalist home with clean lines and negative wall space calls for restrained spacing, while a maximalist, layered interior can support the salon-style approach without feeling chaotic. Coordinating trim and door finishes around the stairwell, an often-overlooked detail covered in guides on interior door trends, can also reinforce the cohesion your art is trying to create.
Three Rules Worth Repeating
The slope math, the eye-level rule, and the mockup step aren’t optional extras. They’re the difference between a stairwell that looks designed and one that looks assembled in a hurry. If you take nothing else from this guide, take this: follow the slope, keep your centers consistent, and mock everything up before you drill a single hole. Custom-sized canvas prints, like the options available through Sense Canvas starting around $85, make it far easier to hit exact dimensions once your template tells you what size you actually need. Pick one layout, tape it up, and live with it for a day before committing.
— Sense
Get a Custom Canvas Sized for Your Exact Stair Wall
Standard frame sizes rarely match the odd dimensions a stairwell hands you, which is where most gallery plans fall apart. Sensecanvas solves that specific problem by printing to the measurements your template already gave you, instead of forcing you to shop around for a frame that’s close enough.

Sense Canvas carries over 15,000 designs across abstract, animal, motivational, and landscape themes, and every piece can be customized to fit the exact size your slope math calls for. If your mockup showed you need an anchor piece at a non-standard size, customization can help you avoid compromise.
A simple sizing rule for your stair wall: measure the largest gap in your template, then choose an anchor canvas close to that size and size the rest of your layout around it. Browse the full catalog and start with a piece like this large-format canvas built for exactly this kind of wall, or head straight to the Sense Canvas homepage to search by size, theme, or price.