How Gallery Walls Work: A Guide for Homeowners and Renters
A gallery wall is a curated collection of framed art, photos, prints, and objects arranged together on a single wall to read as one cohesive focal point rather than a scatter of isolated pieces. Three rules separate a professional-looking result from a random arrangement:
- Consistent spacing: Keep gaps between frames at 2–3 inches (approximately 5–7 cm) for a professional look that avoids a cluttered wall without making pieces feel disconnected.
- Anchor-first layout: Choose one dominant piece as the visual center and build outward from it.
- A unifying thread: Matching mats, a consistent frame finish, or a shared color palette ties everything together.
Custom sizing from Sensecanvas is worth flagging early: when a piece needs to fill a specific footprint in your layout, ordering a canvas in the exact dimensions you need removes the guesswork entirely.
Table of Contents
- What should you decide before buying or hanging anything?
- Which gallery wall layout fits your space?
- How do you plan, mock up, and hang a gallery wall step by step?
- What hardware works best, and what are your options as a renter?
- How do you mix frames, sizes, and media without it looking cluttered?
- Why does sizing matter, and how does custom canvas art help?
- What does a gallery wall actually cost, and how long does it take?
- How do you keep a gallery wall fresh without redoing the whole thing?
- Key Takeaways
- The part most guides skip about gallery walls
- Sensecanvas makes custom sizing simple for any gallery layout
What should you decide before buying or hanging anything?
Planning before you shop saves money and wall damage. Work through this checklist in order:
- Measure your wall area. Tape a rectangle on the floor to represent the wall footprint. Aim to fill a moderate portion of the available wall space for a balanced look — not every inch, not a tiny cluster in the middle.
- Choose your unifying thread. Consistent frames, a shared palette, or matching mats reduce visual noise. Pick one before you buy anything.
- Inventory what you already own. Note exact frame sizes. Identify gaps and decide how many new pieces you need — and whether any require custom dimensions.
- Select your mounting strategy. Fixed nails, picture ledges, or removable strips each carry different weight limits and flexibility. Decide early because it shapes every other choice.
- Gather tools. Tape measure, level, kraft or newsprint paper, pencil, and appropriate hangers. Having these ready before install day prevents the mid-project hardware run.
Pro Tip: Photograph your wall at the time of day you spend the most time in the room. Lighting shifts dramatically, and a photo reveals shadows and glare that affect where pieces should go.
Which gallery wall layout fits your space?
Layout choice drives the entire feel of the room. Each style has a natural home.
- Grid: Identical or similar-sized frames in even rows. Formal, organized, and it reads cleanly on camera during video calls — the go-to for home office backdrops.
- Linear/row: A single horizontal band at eye level. Works best over a sofa, console table, or bed where vertical space is limited.
- Salon style: Mixed sizes spread across a larger area. High visual energy and personality, but it demands strict 2–3 inch spacing discipline — on camera, loose spacing reads as chaos.
- Asymmetric clusters: Small groups of 3–5 pieces. Good for entrances, small walls, and anywhere you want a collected feel without committing to a full wall.
- Ledge/rail: Floating shelves or picture ledges that hold leaning frames. The most flexible option for renters and anyone who rotates art seasonally.
Grid and linear layouts photograph best for video-call backdrops. Salon style is more dynamic in person but demands tighter spacing control to avoid looking cluttered on screen.

How do you plan, mock up, and hang a gallery wall step by step?
Follow this workflow once and you will not need to patch unnecessary holes.
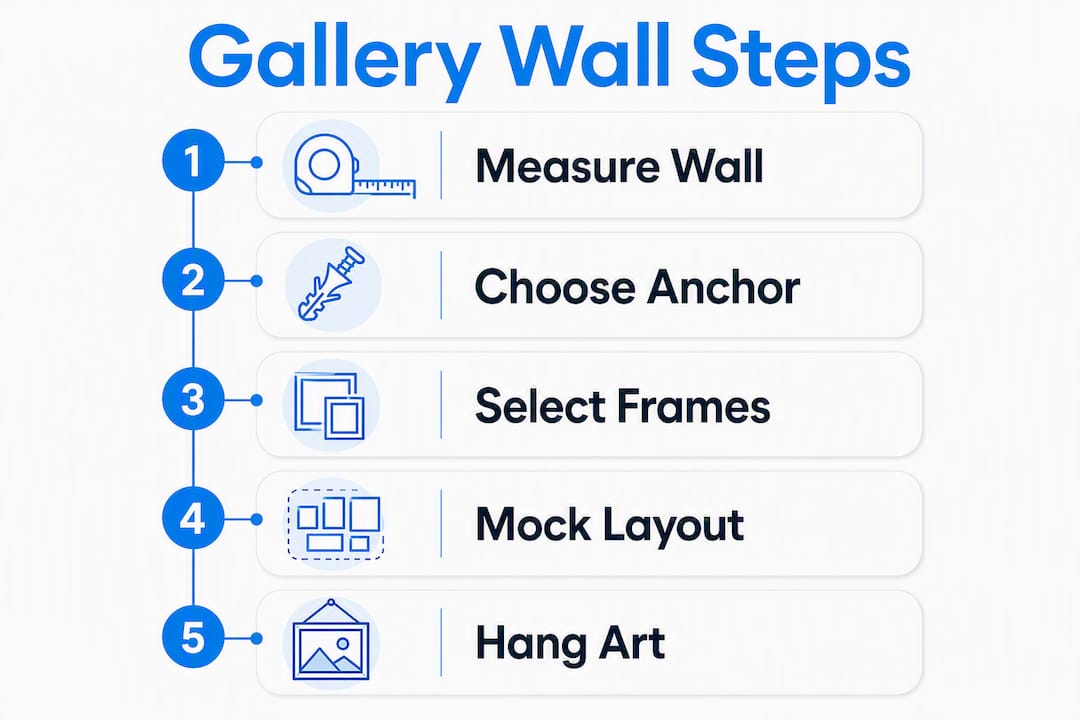
- Measure and map. Record wall width and height. Tape a matching rectangle on the floor and photograph it for reference.
- Pick your anchor piece. The largest or most meaningful piece becomes the visual center. It can sit dead center or slightly off-center — both work, as long as everything else relates to it.
- Floor layout. Lay all frames inside the taped box. Experiment with groupings and photograph the arrangements you like.
- Kraft paper templates. Trace each frame onto kraft or newsprint paper and cut them out. Tape the templates to the wall. This lets you test the full layout without a single nail hole. Mark the exact nail position on each template.
- Check spacing and height. Confirm 2–3 inch (5–7 cm) gaps between every template. Mark the composition center at 57–60 inches (145–152 cm) from the floor.
- Hang anchor first, then build outward. Start with the largest piece — centered or slightly off-center — and add pieces around it. Working outward prevents a lopsided result.
- Final check. Step back and view from your normal seated or standing distance. Fine-tune anything that pulls the eye in the wrong direction, then remove the paper templates.
Pro Tip: Snap a photo from your typical viewing distance before committing. A camera preview catches compositional imbalances your eye skips over when you’re standing close to the wall.
What hardware works best, and what are your options as a renter?
Weight determines hardware. Get this wrong and frames fall.
- Light pieces (under ~10–16 lb): Removable picture hanging strips such as Command strips work well. Command Picture Hanging Strips are rated per pair, so check the pack rating against your frame weight before you commit.
- Medium pieces (~10–25 lb): Single-hook picture hangers or 30-lb rated hooks. Use drywall anchors if you cannot hit a stud.
- Heavy pieces (25–50+ lb): Aim for studs, use two anchor points, or mount a French cleat for large mirrors and framed canvases.
- Renter-friendly methods: Picture ledges, Command strips (they remove cleanly from most painted drywall), and leaning canvases on shelves. Canvas prints are lighter than glass-framed prints, which expands your removable-strip options.
Canvas prints carry a real weight advantage here. A large canvas on a stretcher bar typically weighs significantly less than the same image behind glass, which means more pieces qualify for renter-safe mounting.
How do you mix frames, sizes, and media without it looking cluttered?
Designers consistently recommend that the strongest gallery walls feel collected over time rather than purchased as a matched set. Four principles keep an eclectic mix from tipping into chaos:
- Unify with one thread. Matching mats, a consistent frame finish (all black, all natural wood), or a limited palette creates cohesion even when everything else varies.
- Balance scale and orientation. Alternate horizontal and vertical pieces. Odd numbers of elements tend to feel more natural than even groupings.
- Add texture and depth. One or two 3D pieces — a textile, a shadow box, a small shelf object — give the eye somewhere interesting to land.
- Use negative space deliberately. Pieces need breathing room to read as a group. Filling every inch turns a gallery wall into wallpaper.
For visual balance, place heavier visual-weight pieces (darker colors, larger frames) opposite lighter ones, and distribute color accents across the composition rather than clustering them in one corner.
Why does sizing matter, and how does custom canvas art help?
Material and size decisions affect everything downstream — hardware choice, visual weight, and whether the layout actually fits the wall.
Canvas offers glare-free viewing and lighter weight than glass-framed prints, which matters both for hardware selection and for rooms with strong directional light. Framed prints behind glass look more formal but add weight and introduce glare near windows.
Sizing is where most DIY gallery walls go wrong. You plan a layout, order standard-size prints, and end up with awkward gaps or a piece that’s slightly too large for its spot. Custom canvas prints solve this directly — you specify the exact dimensions that fit your planned layout, so the anchor piece fills its footprint and supporting pieces slot in without adjustment. Sensecanvas offers customizable canvas options starting at $85, which puts custom sizing within reach compared with custom framing routes that often cost multiples of that for a single piece.
What does a gallery wall actually cost, and how long does it take?
Budget and timeline vary widely, but here are realistic ranges:
- Low budget: Downloaded prints in thrift-store or IKEA frames. Cost is mostly your time. Turnaround is a weekend.
- Mid-range: Custom canvas prints from Sensecanvas (starting at $85 per piece) or mid-tier framing. Print and shipping lead times run roughly 1–2 weeks; budget 2–3 weeks total from order to install.
- Higher end: Custom framing with glass, professional installation. Lead times stretch to 3–4 weeks and costs scale with frame complexity.
A single DIY install day covers most layouts once you have everything in hand. The planning and sourcing phase takes longer than the actual hanging.
Budget tip: Spend on one strong anchor piece and use lower-cost prints or canvas art for the supporting pieces. The anchor carries the composition; the supporting pieces just need to complement it.
How do you keep a gallery wall fresh without redoing the whole thing?
A gallery wall should evolve, not calcify.
- Dust frames monthly with a microfiber cloth and check hanging hardware every few months for loosened fasteners.
- Use a picture ledge to make swaps effortless — no new holes, no patching. Swap 1–3 pieces per season to keep the wall feeling current.
- Keep a small kit nearby: spare hooks, Command strips, a level, and a few backup frames. Quick changes stay quick when the tools are already there.
- Add new pieces gradually as you find meaningful ones. A wall that grows over time has more personality than one assembled in a single afternoon.
Key Takeaways
A gallery wall works when three rules hold: consistent 2–3 inch spacing, an anchor-first layout, and a single unifying thread running through every piece.
| Point | Details |
|---|---|
| Spacing standard | Keep gaps between frames consistent to avoid clutter and maintain a professional look. |
| Center height | Place the composition center at 57–60 inches (145–152 cm) from the floor for comfortable adult eye level. |
| Kraft paper templates | Trace frames, tape to the wall, and mark nail points before hanging to avoid unnecessary holes. |
| Renter-friendly hardware | Picture ledges and Command strips rated per pair let you hang and swap art without wall damage. |
| Sensecanvas custom sizing | Custom canvas prints starting at $85 remove awkward gaps and let you match exact layout dimensions. |
The part most guides skip about gallery walls
The conventional advice is to plan everything before you hang a single nail. That’s correct, but it misses something: the best gallery walls are never truly finished. The ones that look most intentional are usually the ones that started with one meaningful piece and grew slowly.
Most people try to source the whole wall at once, which leads to over-matching — everything coordinates so perfectly that the wall looks like a store display rather than a life lived. The collected feeling that designers point to as the mark of a great gallery wall comes from pieces added at different times, for different reasons.
For renters especially, ledges change the equation entirely. You can rearrange without touching a nail, rotate pieces seasonally, and take the whole thing down in an afternoon. Pair that with custom canvas art sized to your specific wall dimensions, and the usual frustrations — awkward gaps, pieces that are almost the right size — disappear.
The paper template step feels tedious until the first time it saves you from patching six extra holes. Do it every time.
Sensecanvas makes custom sizing simple for any gallery layout
Sizing is the problem that derails most gallery wall projects. You plan a layout, measure carefully, and then discover that standard print sizes leave a gap or force you to rethink the whole arrangement. Sensecanvas solves that at the source: over 15,000 designs available in custom dimensions, so you order the exact size your layout needs rather than adapting your layout to what’s in stock.

Canvas prints are also lighter than glass-framed alternatives, which means more pieces qualify for renter-friendly mounting. Prices start at $85, and the catalog spans abstract art, nature, motivational themes, cityscape prints, and more — enough range to build an entire gallery wall or fill the one gap your current arrangement needs.
Measure your wall, decide your anchor piece size, and browse the Sensecanvas catalog to find a print that fits. The kraft-paper template step takes 20 minutes. The wall can be up the same day your order arrives.