How to Choose Art Size for Your Home Walls
Art should fill a significant portion of an open wall’s width, typically around three-fifths to three-quarters, or a similar proportion of the width of the furniture it hangs above. This guideline covers the majority of sizing decisions in any home. For instance, a standard sofa calls for art that proportionally relates to its width, and a blank dining room wall benefits from a piece or grouping sized accordingly.
A few situations where the standard range shifts:
- Tall ceilings (10 feet or higher): Scale up. Art that reads perfectly in a standard 8-foot room will look stranded under a high ceiling. Consider oversized pieces or a vertical gallery grouping.
- Very bold, high-contrast imagery: A dark, graphic piece reads visually heavier than its dimensions suggest. You can often go slightly smaller than the formula recommends.
- Narrow hallways or tight spaces: Lean toward the lower end of the range (closer to 57–60%) so the piece doesn’t overwhelm the passage.
Pro Tip: Before you calculate anything, decide whether the art is anchoring furniture or filling a blank wall. The formula is the same, but the measurement you plug in changes.
Key Takeaways
Choosing the right art size comes down to one measurement, one formula, and one mockup before you order.
| Point | Details |
|---|---|
| Core sizing rule | Art should fill 60–75% of open wall width or 57–75% of the furniture width below it. |
| Hanging height | Center the piece at 57–60 inches from the floor; drop to 48–54 inches when hanging above furniture. |
| Gallery walls | Treat the group as one artwork sized to 60–75% of the wall; keep frame spacing at 2–4 inches. |
| Resolution for large prints | Use 150–200 DPI for large canvases viewed from distance; 300 DPI for prints under 18 inches. |
| Sensecanvas custom sizing | Order exact calculated dimensions from Sensecanvas’s 15,000+ design collection starting at $85. |
Table of Contents
- How do you measure a wall for the right art size?
- Room-by-room sizing rules that actually work
- Where should you hang art on the wall?
- How do you plan a gallery wall that looks intentional?
- Art size chart: common dimensions and where they work
- What resolution do you need for a large canvas print?
- How to test art size at home before you buy
- Why scale matters more than most people realize
- A canvas seller’s honest take on sizing decisions
- Sensecanvas makes custom sizing straightforward
- Sources
How do you measure a wall for the right art size?
Getting the numbers right takes about five minutes and a tape measure. Here’s the exact process:
- Measure the wall width. Run the tape from one edge of the open wall to the other, or from corner to corner if the wall is bounded. Write it down in inches.
- Measure the furniture width. If art will hang above a sofa, bed, console, or mantel, measure the furniture’s width at its widest point.
- Calculate your target art width. Multiply the relevant measurement by 0.57 and 0.75 to get your range. For a 72-inch sofa, calculate a proportional range for target art width that covers a sensible portion of the sofa’s width without overpowering it.
- Account for frame and mat. A canvas print’s listed size is the image area. Add a frame and you gain 1–3 inches per side. A mat adds another 2–4 inches. If you’re ordering a framed piece, subtract the frame width from your target before choosing the canvas size.
- Measure for height. Note the wall height and the height of any furniture below. This feeds your hanging-height calculation (covered in the next section).
Pro Tip: Tape a piece of paper or painter’s tape to the wall at your calculated dimensions before ordering. Step back to your normal viewing spot — the couch, the dining chair, the doorway — and live with it for a day. Dimensions that look right on paper sometimes feel off in the room.
According to Kendra Castillo’s sizing guide, converting furniture width to an art-width range (0.57–0.75 × width) removes the guesswork for common placements like sofas and beds. The math is simple; the harder part is remembering to measure the furniture, not just the wall.
Room-by-room sizing rules that actually work
The 60–75% rule applies everywhere, but each room has its own quirks.
Above a sofa
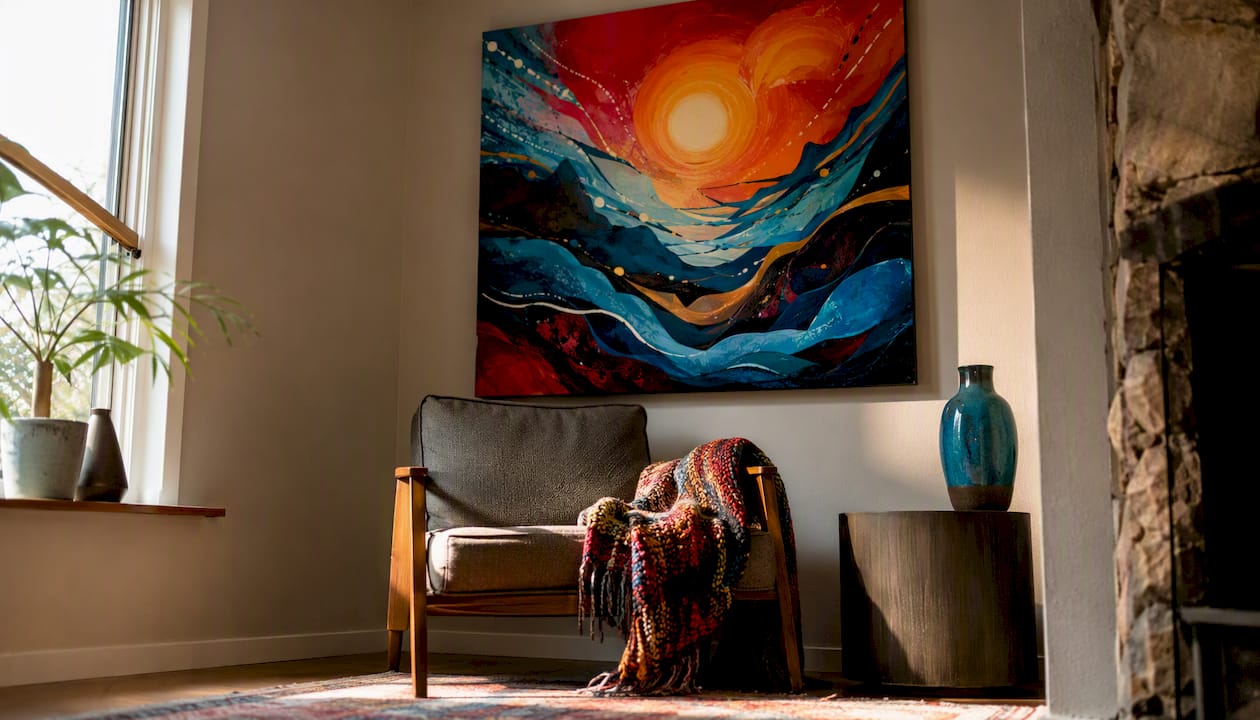
The sofa is the most common placement question. Printkeg’s canvas print size guide puts it plainly: art should span approximately two-thirds to three-quarters of the sofa’s width. For a standard sofa, the artwork typically spans a proportion of its width that offers balance, avoiding too small or too large sizes. Leave at least 6–8 inches of sofa visible on each side so the art doesn’t appear to float off the furniture entirely.
Above a bed
The headboard is your reference point, not the full bed width. A queen headboard is often around five feet wide, with artwork sized to feel balanced but not overpowering; a king headboard is wider and accommodates correspondingly larger art. A single large piece works well, as does a diptych or triptych sized to the same overall footprint.
Above a fireplace mantel
Mantels vary widely, but the same two-thirds-to-three-quarters rule applies to the mantel shelf width. Leave 3–6 inches of mantel visible on each side. Vertically, art above a fireplace often reads better slightly taller than wide, since the firebox below creates strong horizontal weight.
Dining room walls
Art hung too small in a dining room disappears behind the visual noise of chairs, table settings, and lighting.
Hallways
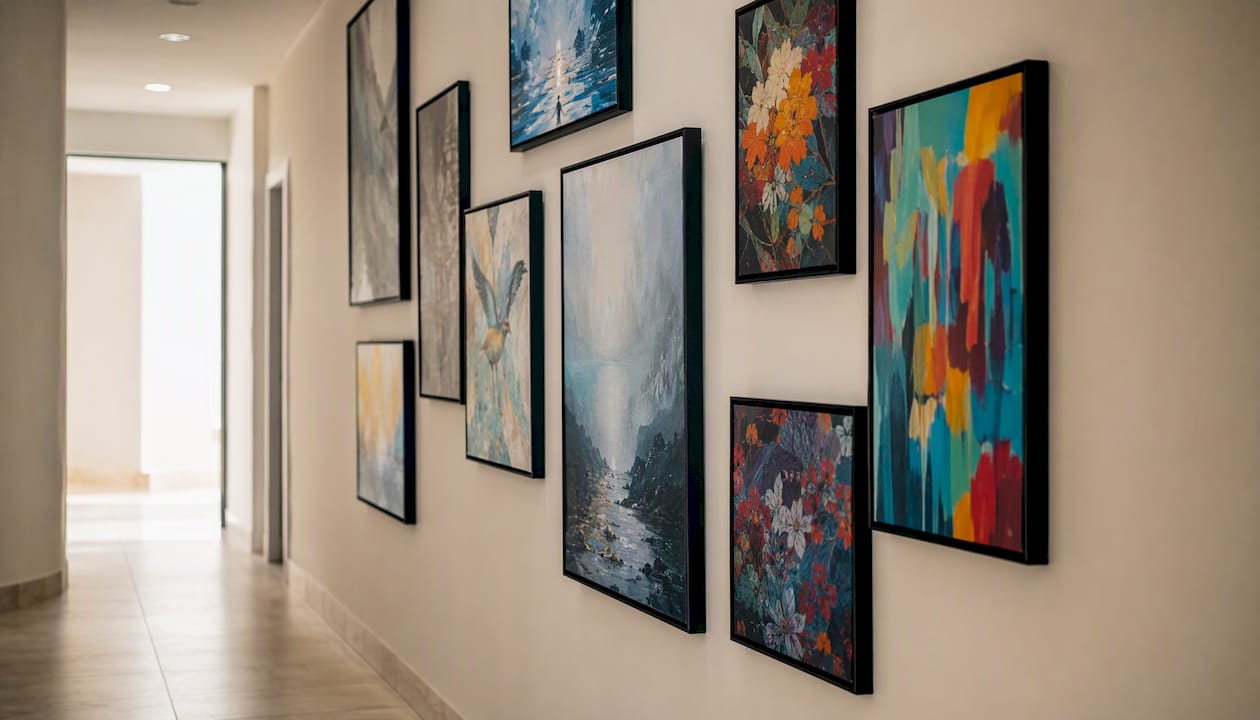
Hallways reward horizontal pieces or a vertical series. Spacing between pieces in a series: 2–4 inches.
Pro Tip: In open-plan spaces where the living and dining areas share a wall, treat each zone’s wall as its own measurement. Don’t try to size one piece to span both zones.
Here’s a quick reference for common furniture widths:
Where should you hang art on the wall?
The gallery standard is to center art at 57–60 inches from the floor. That places the visual midpoint of the piece at average eye level for a standing adult, which is why museums and galleries use it universally. Saatchi Art’s wall art guide confirms this convention and adds a practical spacing note: when hanging above furniture, leave roughly 6–12 inches between the top of the furniture and the bottom of the frame.
To calculate where to put the nail: take 57 inches, add half the art’s height, then subtract the distance from the top of the frame to the hanging hardware on the back. That’s your nail height.
When to break the 57-inch rule:
- Above a sofa or bed: Lower the center to about 48–54 inches so the art reads as connected to the furniture rather than floating above it.
- In rooms where people mostly sit: Drop the center 4–6 inches from the standard. Art that looks right when you’re standing can feel too high from a seated position.
- Tall ceilings: Raise slightly, but resist the urge to go too high. Art hung near the ceiling in a 12-foot room looks like it’s trying to escape.
- Stairwells: Follow the stair angle. Keep the center of each piece at consistent eye level as you ascend.
Pro Tip: Cut a piece of paper to the exact dimensions of the art, tape it to the wall, and sit in your normal spot. If it feels too high from the couch, lower it 3 inches. This takes 10 minutes and saves a lot of unnecessary nail holes.
The ArtPlacer home art guide recommends thinking of hanging height as part of the sizing decision, not a separate step. A piece hung at the wrong height can look undersized even when the dimensions are correct.
How do you plan a gallery wall that looks intentional?
A gallery wall works when the group reads as one composed artwork, not a random collection. The key is treating the entire arrangement as a single piece and sizing it to 60–75% of the wall width, just like a solo piece.
Start with an anchor piece, then build around it:
- Choose your largest or most visually dominant piece. This is the anchor. It should sit near the center of the grouping, slightly above the visual midpoint.
- Measure the total wall space you want the gallery to occupy. Apply the 60–75% rule to get the grouping’s outer boundary.
- Lay all pieces on the floor in the arrangement you want. Trace the outer edge of the group with tape on the floor to confirm the overall footprint.
- Keep spacing consistent at 2–4 inches between frames. Tighter spacing (2 inches) reads more formal; looser spacing (4 inches) reads more casual.
- Transfer the layout to the wall. Start by hanging the anchor piece at the correct height, then work outward.
Common gallery templates and when to use them:
- Tight grid: Same-size frames, uniform spacing. Works in modern or minimal interiors. Requires precision but looks clean.
- Horizontal row: Three to five pieces at the same center height. Good above a long sofa or console. Easy to execute.
- Salon-style: Mixed sizes, asymmetric arrangement. Suits traditional or eclectic rooms. The anchor piece keeps it from looking chaotic.
- Triptych: Three panels of the same image or complementary images. Treat as one piece for sizing purposes.
Pro Tip: Trace each frame on kraft paper, cut out the shapes, and tape them to the wall before driving a single nail. Rearrange until the layout feels right. Vertical viewing always reveals spacing issues that the floor layout hides.
For gallery wall planning, consistent frame style or matting across the group creates visual cohesion even when the subjects vary widely.
Art size chart: common dimensions and where they work
The Society6 wall art size guide organizes standard sizes into four categories. Here’s how those map to real rooms and furniture:
| Size Category | Example Dimensions (inches) | Best Placement |
|---|---|---|
| Small | 8×10, 12×16 | Desk, nightstand, small shelf grouping, bathroom |
| Medium | 16×20, 18×24, 20×24 | Bedroom accent wall, hallway, above a console |
| Large | 24×36, 30×40, 36×48 | Above a sofa, dining room wall, bedroom focal wall |
| Oversized | 40×60, 48×72 | Large living rooms, open-plan spaces, commercial interiors |
Popular versatile sizes from Printkeg’s canvas recommendations include 16×20, 24×36, 30×40, and 36×48, plus panoramic formats for long sofas or entry walls.
A few practical notes on frames and mats:
- A 1.5-inch gallery-wrap canvas adds no frame but the sides show, so the visual size matches the listed dimensions.
- A thin frame (0.75–1 inch) adds about 1.5–2 inches to each dimension overall.
- A mat plus frame combination on a 24×36 print can push the final hanging size to 28×40 or larger. Always confirm the framed dimensions before ordering if you’re working within a tight size target.
For smaller rooms, canvas art for small spaces often benefits from one medium-large piece rather than several small ones, which can make a compact room feel busier.
What resolution do you need for a large canvas print?
Resolution determines whether a large print looks crisp or muddy. The standard target for close-viewing prints (under 18 inches) is 300 DPI (dots per inch). For large wall canvases viewed from several feet away, print shop guidance commonly puts the acceptable range at 150–200 DPI, since viewing distance compensates for lower pixel density.
To calculate the pixel count you need: multiply the print’s inch dimensions by the target DPI.
- A 24×36-inch canvas at 150 DPI requires a 3,600 × 5,400-pixel image.
- The same canvas at 200 DPI requires 4,800 × 7,200 pixels.
- A 16×20-inch print at 300 DPI needs 4,800 × 6,000 pixels.
| Print Size | Viewing Distance | Minimum DPI | Minimum Pixels |
|---|---|---|---|
| Up to 18×24 in | Under 3 feet | 300 DPI | 5,400 × 7,200 |
| 24×36 in | 4–6 feet | 200 DPI | 4,800 × 7,200 |
| 36×48 in | 6–10 feet | 150 DPI | 5,400 × 7,200 |
| 48×72 in | 10+ feet | 150–200 DPI | 4,800 × 7,200 |
When ordering a canvas print, also account for bleed (usually 0.5–1 inch on each side that wraps around the stretcher bar) and any gallery-wrap depth (typically 0.75 or 1.5 inches). The image area you see on the wall is smaller than the total canvas size ordered.
Pro Tip: Ask your printer for a small test print or a digital mockup at full scale before committing to a large order. Most reputable canvas printers will flag resolution issues before printing, but confirming beforehand saves time.
How to test art size at home before you buy
Buying art without testing the size first is how you end up with a piece that looks right in the cart and wrong on the wall. The tape method takes about 15 minutes and costs nothing.
- Cut paper or use painter’s tape to mark the exact dimensions of the art on the wall.
- Step back to your normal viewing spot — the sofa, the dining chair, the doorway — and look at it for a few minutes.
- Photograph the wall from that spot. The camera flattens the space and often reveals sizing issues your eye glosses over in person.
- If it feels too small, expand the tape outline by 10–15% and look again. If it feels too large, reduce it.
- Once the taped outline feels right, note the dimensions and use those as your order specifications.
Other mockup methods worth knowing:
- Cardboard cutouts: More rigid than tape, easier to reposition. Good for testing multiple size options quickly.
- Phone photo editing: Take a photo of the wall and use an app like Canva or Adobe Express to drop in a scaled rectangle. Not perfectly accurate, but useful for a rough sense of proportion.
- Online room visualizers: Some canvas retailers offer digital room mockup tools where you upload a photo of your space and preview art at different sizes.
Pro Tip: View the mockup from the distance you’ll normally stand or sit. A piece that looks proportional from 2 feet away can feel undersized from 10 feet across the room.
Why scale matters more than most people realize
Most people who hang art that looks “off” haven’t chosen the wrong style or subject. They’ve chosen the wrong size. A piece that’s too small for its wall reads as an afterthought, not a focal point. Designers consistently prioritize a single properly scaled statement piece over several smaller works in a large living room, because scale creates a clear focal point and avoids the cluttered look that comes from filling space with undersized art.
They reflect how the human eye reads a room: we look for anchor points, and art that fills the expected visual field of a wall or furniture grouping registers as intentional.
The most common sizing mistake isn’t going too large. It’s playing it safe with something too small, then wondering why the room still feels unfinished. Designers who work with residential clients report that clients almost always wish they’d gone bigger after seeing the piece on the wall.
Visual weight matters as much as physical dimensions. A high-contrast or dark piece reads larger than a light, airy one of the same size. If you’re working with bold imagery, you can often go slightly smaller than the formula suggests and still achieve the same visual presence. For quiet, neutral pieces, lean toward the upper end of the range.
Pro Tip: When in doubt between two sizes, go with the larger one or build a gallery grouping to increase visual weight. Undersized art is a much harder problem to fix than art that fills the wall confidently.
For art placement in home decor, scale is the single variable that separates a room that feels designed from one that feels assembled.
A canvas seller’s honest take on sizing decisions
Custom sizing is worth it more often than people expect. Standard sizes like 16×20 or 24×36 fit many situations, but they rarely fit all of them. A sofa that’s 78 inches wide calls for art around 44–59 inches wide. The closest standard size might be 48×36, which works. But if the wall height is 9 feet and the sofa sits in a large open-plan room, a 48×60 custom size reads far better and costs only marginally more.
Finish choices affect perceived size, too. A gallery-wrap canvas with 1.5-inch sides reads slightly larger than its listed dimensions because the sides carry the image. A thin-frame print reads slightly smaller. When you’re on the fence between two sizes, the gallery wrap often tips the balance without requiring you to go up a full size.
One practical suggestion: when ordering from a retailer with custom sizing, input the dimensions you calculated from your wall measurement rather than rounding to the nearest standard size. The difference between a 44-inch and a 48-inch canvas is small in price but visible on the wall.
Sensecanvas makes custom sizing straightforward
You’ve done the math. You know your target dimensions. The next step is finding a piece that actually fits those numbers, not the other way around.

Sensecanvas carries over 15,000 designs across abstract, nature, motivational, and dozens of other themes, all available in custom sizes so you order the dimensions your wall actually needs rather than settling for whatever standard size is closest. Prices start at $85, and the ordering process lets you specify width and height directly. Whether you’re sizing a 30×40 canvas above a queen bed or a 48×60 statement piece for a large living room wall, the Sensecanvas canvas wall art collection has the range to match. Pick your design, enter your calculated dimensions, and get exactly the size the room calls for.
Sources
These are the primary references used to build the rules, charts, and guidelines in this article: